Rock N Roll Night Caustics Tutorial | Tutorials |
Rock N'' Roll Night Tutorial
To create the image I
recently uploaded called "Rock N'' Roll Night"
I first added the basic river terrain in the bryce presets – Thus:
1. click on "Create"
2. Select the basic river terrain
3. click on the tick
The terrain thus arrives in your scene, place it where you want it and add a material to it – I used ''desert 22'' from the Seriously Real ''Cold Desert'' presets:
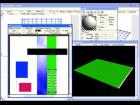
Then create a new default
terrain, and go into the terrain editor by clicking on the E here:
In the terrain editor:
1. click on New.
2. click on the down arrow by Fractal
3. Then click on Cauliflower Hills from the drop down menu
Next add a water material to this terrain, I chose "A Slight Wind" from the Turbulent water presets, thus:
You can then position the terrain to match the riverbank terrain – notice that the riverbank terrain slopes down in one direction. I simply ignored this and rotated the riverbank upward to counteract this after aligning the water terrain with the riverbank terrain.
Group the water terrain and riverbank terrain, before trying to rotate them both – if you are going to do this, otherwise ignore it.
Here you can see that the water terrain is too wide or high – so if yours is too high as well then find the Y and lower it, smoothing out the terrain – but don’t make it totally flat. That way it''s almost level but still has some slight bumpiness to go with the material.
That''s better.
Position the water terrain like this:
And it should look like this from an aerial position:
You then need a rock.
I just kept clicking until a rock I liked arrived. I chose one with a shelf area on it so I could put my swiss roll on the shelf. You could try that.
or:
This time I''m going to change it slightly by using a rock I made in Wings3D especially for this tut - with a shelf on it, you could use that if you prefer, I''ll upload it to my portfolio.
Whichever way you go, position your rock how you want it on the river
bank. I find it''s easier to tell what
you are doing if you place your material on the rock from the beginning, since
that dead black that Bryce6 insists on showing when you import things, doesn''t
help much. I''m using Waterline Moss from
the Stones/Rocks presets:
Then position the rock on the bank.
Next we need the lights with the caustics.
Now here is the address of the AntFarm caustic – it is available free from Daz3d in one of the threads there:
http://johnvanfleet.com/AntFarm/OceanLights.html
This has a download of a bryce5 file with just the light with the caustic on it, save the light as a bryce object (*.obp) by going to the "Create" menu and clicking on ADD when you have the light highlighted in the scene. You can then re-open the riverbank scene and add the light with caustic from the "Create" menu as normal.
I also used the Caustic Generator to create some more caustics for myself, the caustics Generator can be obtained here:
http://www.lysator.liu.se/~kand/caustics/#download
With this I made these:
Then I thought, why not try making one from scratch in PaintShop or Photoshop?
So I did:
You
can see that it''s not as regular as the caustics generator ones, so in order to
make it more regular I created 4 layers in that image, and using the selection
tool copied one quarter of the original image and flipping it through
horizontal and vertical as required pasted it into each layer once in a
different corner.
Creating this:
As you can see this is much more
regular, so much so that it''s mirrored both vertically and horizontally, like a
Rorschach ink blot test. It does however
do the job very well, let''s take a look.
Create a light:
Click on the "E" to enter the light lab.
1. Click on "Use Gel"
2. Click on "Image"
3. Click on the colour square to get an eye dropper.
4. Click in the rainbow of colours for the colour you want to use – I''ve chosen a turquoise blue.
Next, still in the light lab you need to chose intensity for the light,(try 30) an amount of ranged falloff, (I chose 30) soft shadows (again I chose 30, try these settings first, if you don''t like the effect, fiddle with the settings until you get something you like better.)
Here are some experiments with the caustic lights:
1. The purple light has ''Fran''s Made Caustic'' set to parametric in the materials lab (– this is just changing how the image is mapped by Bryce.)
2. The yellow one has the same image – but I added a soft
centre to the image (– don’t worry I will upload them all) very easy to do,
just using a soft round brush set to about 23% Opacity and at around 400 in
size – used that once in the centre of the image, then reduced the size to
about 200 and used it 1 or at most 2 more times to increase the density of the
very centre, but only a little.
Result:->
3. The flaming red light uses one of the caustics from the Caustics
Generator but again with a soft centre spot:
and as you see, set to Random
mapping mode. (I used a good strong red when picking the colour for the light
in the light lab.)
4. Uses my own made caustic again but this is without adding the soft centre, and set to Random – see the difference?
5. Here the green light is set to object space and uses the original caustic I made but before it was made into a regular mirrored pattern, as you can see with different mapping modes you can get different effects with different patterns and colours, the lesson is to try it and see.
And this is what you can get on the rocks:
You can see that there is a gap in the cast light, this is created by the stone, but to counteract this I used more than one light, and positioned them around/infront of/to the side of – the stone, as required. But to ensure that the light went only where I wanted it, I used spotlights – these also work well with caustics. In fact you can use a spotlight for the overhead light too instead of a radial, if you prefer. But be careful, with spotlights you can end up with hard edged circles of light, instead of the soft fade away you see above.
Now we have riverbank, water, rock, lights – so if you want to add a chocolate covered duvet, go right ahead, the duvet can be downloaded from here:
http://www.sharecg.com/v/16588/3d-model/RolledDuvet
All I did with it was to squish it up from this:->
to this:
<-
Thus creating all those nice dips for the chocolate.
By grabbing the x and moving the cursor in the direction of the dotted yellow arrow.
and then you add a chocolate material from the misc presets.
Now on to the light rays.
I added 3 cones thus: ->
Those two spheres are the targets for the lights, one was positioned on top of the flat rock, and one in front of it, they are both hidden – click on the ''A'' and tick ''Hidden'', on each sphere to do this.
Then in the lights, click on the ''A'' then ''linking'' then on ''Object Parent Name'' and find the sphere you want to use as a target from the list. Do the same for ''Track Object Name'' then click okay to leave that menu.
These cones I made very tall simply by grabbing the ''Y'' and thus elongating each cone, then I positioned each cone, one inside the other.
Then all that remains is to add a nice whispy material to the cones. For the biggest one I used lit rays (from ComplexFX/Celestial) but increased the transparency up to... 28.8
For the middle cone I used ''Green Lit'' also from ''ComplexFX'' but this time from ''Crazy'' not ''Celestial''
here are the settings I used: ->
Notice also that I used a volume setting here not surface.
For the last and innermost cone I used:
Which is just ''green lit'' again but softer with slight colour changes too.
All I did then was to add the same desert material to the infinite plane as I had on the riverbank – no point in adding it too soon, as it''ll just increase the render times. Oh and talking of render times, take care to use just the lights you need and no more since every light added increases the render times quite a bit, as does the volume material on the cones.
After that, it''s time to add a bit of grass between the camera and the riverbank, a twig or two, and render the full scene:
P.S. I also used some lights between the grass and the camera otherwise the grass just looks black.
Now you can follow that along and see what happens, or you can vary things along the way – for instance, this is just one of the effects you can get with caustic lights, here''s another:
Have fun testing things out!
FranOnTheEdge
FranOnTheEdge »
Portfolio | Gallery | More Tutorials | Added 16 years ago
Tools: Adobe Photoshop, Bryce, Other
Subject: Lighting, Materials
|
log in to rate
Views: 3,927 Downloaded: 64 |
|







except a lot of the text disappears under the pics :-(
tried the download and got the pic lol
excellent piccie by the way ;-)
any chance of you reposting as an html or pdf Fran??